
Laser Cutting Countersunk Holes
Did you know that you can create chamfers and even countersink holes with a laser cutter? While it may not seem like a big deal to do this with a drill press for one-offs, this can be a very useful trick for reducing labor on low volume production parts - such as a batch of locally hand made goods with lots of holes.
One can achieve a countersink by simply doing multiple passes around the hole diameter at varying height offsets. The first step is to go out of focus by a large distance, burn the circle, and then progressively get closer and closer to the workpiece while burning a smaller subsequent circle.
This creates an average power distribution where the outside edge has the lowest average power, and the inside area undergoes the highest average power, creating our countersunk hole.
If you’re lucky enough to use Lightburn as your laser software, this is extremely easy to do using their settings. We hope this trick comes in handy at some point for all our readers!

Countersunk holes in wood
This image demonstrates the countersunk hole made by the laser in 1/2’’ plywood. While the countersunk surface may not look the nicest, it’s mostly hidden after installation of the screw. most importantly, it doesn’t take long, and you can create many countersunk holes without any manual labour!

Countersunk holes in acrylic
This technique works on acrylic as well, although acrylic tends to melt and you may need to knock off any melted bits that protrude from the surface of the part. Easy to do with a knife or sharp spatula.
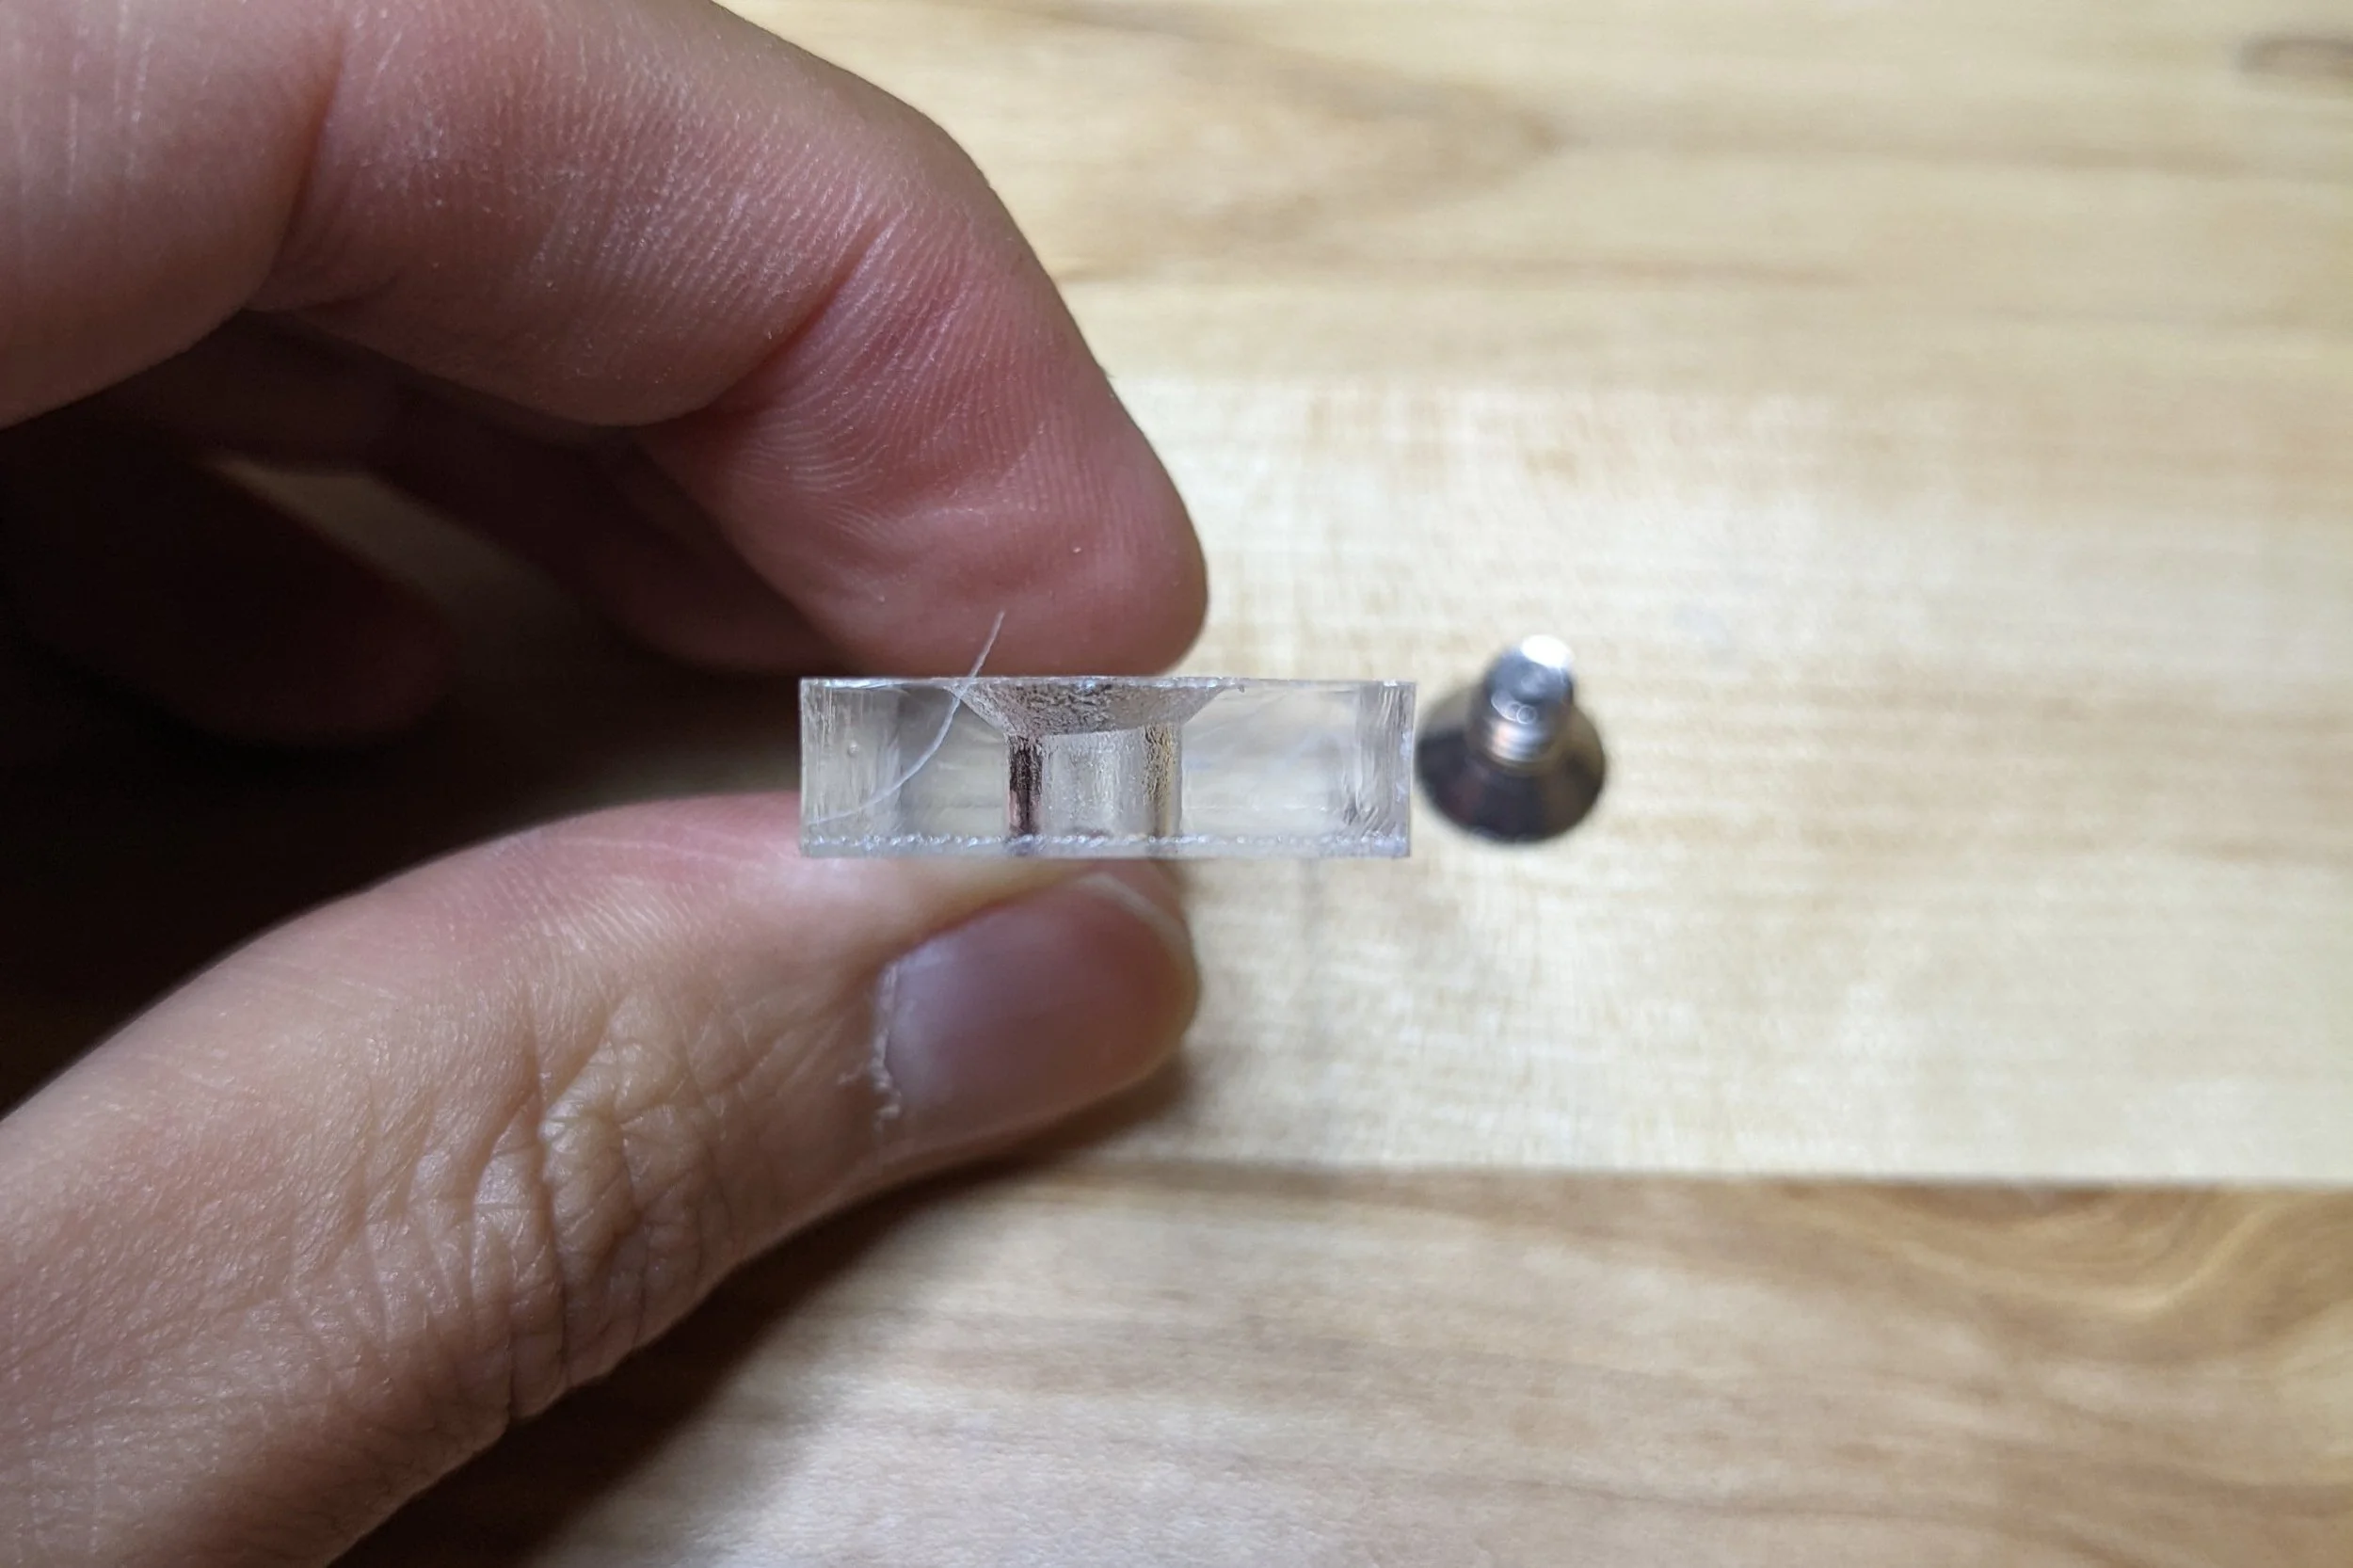
Hole cross section
Here’s a picture of the cross section in a piece of 1/4’’ clear acrylic. You can clearly see the countersunk portion that was made by the laser. There seems to always be a slight asymmetry because as the laser melts and pushes the material around, it has to displace somewhere and will either displace on top of the material, or to the start/end of the toolpath.